And they are getting even more strict when it comes to not using invoices for charging for Digital Goods.
Whatever Invoices make you uncomfortable or not, you gotta start using them if you want to keep your PayPal and your money. Changes starting this October 19th.
Honestly I don’t get why so many artists are so overwhelmed by invoices, takes just a few clicks to set up.
And is not only “oh you have to use invoices because PayPal says so” if you don’t use invoices you’re putting yourself at risk of being scammed by an user abusing the buyer’s protection.
Since PayPal ain’t got no idea of what those $50 you received were for, but the buyer is saying they didn’t got anything for the money, PayPal will just side with the buyer.
I’m seriously begging ppl, start using invoices. I’m tired of seeing ppl complain their paypal was banned, or is under investigation, or worse, the $100 they got for a very complicated commission, 3 months later get a refund issue.
just
start
using
invoices
for your own sake.
Here is how you use invoices because I can’t keep playing devil’d advocate, yes I would love to help you get your PayPal restored but just this last month I had to help three persons, and they were MORE than aware of this issues.
Just protect yourself.
Step 1. You login and click here
Step 2. You click create new Invoice. YOU NEVER CLICK REQUEST MONEY, unless you want to risk yourself to get scamer by buyer’s protection exploit and not only lose your money but your paypal account, and any future paypal linked to your irl name.
Step 3 You follow this steps
1. Invoice for amount only
2. Ask your client for their PayPal email and put in that field
3. Add a vague description of what you’re doing, something like “Character Coloured with Background” is good enough, and if you need more than 1 character you can type in “2″ where it says amount, or just say “2 characters”.
Warning: don’t type in “Naruto rawing Sasuke”. That will get you banned.
4. Click send.
Optional steps. Create a template, doesn’t take more than 10 minutes and it will save you a lot of time for future invoices, you can even click on “items” right next to “create invoice” and add a list of services you offer such as “character sketch” “character flats” along with a price, so next time you invoice you just add to the invoice from your list of items and you saved yourself some more time.
More importantly, you protect yourself from buyer’s protection exploit because if PayPal knows you’re doing digital goods, then you will be allowed that you did in fact created a digital good.
Keep PayPal happy, as for right now there are no alternatives to this service, and this is the only source of income for many freelancers.
Stay safe.
Heads up, all commissioning artists
I’ll be doing this from now on!
ADDING THIS BC I HATE PAYPALLLL
OK so when you send/make invoices…it doesnt let you choose ‘digital good’ or differentiate between “goods (as in physical)” and “services” (as in doesnt need address) which is what you could do with micropayments….
SO WHEN U SEND INVOICE the buyer will be asked for their shipping address. ( I even had the options turned off for shipping?? I was pretty sure there USED TO be an option that you turned off and then it wouldn’t ask for shipping, but that doesnt seem to work anymore? I went to where the setting was and still had the boxes unchecked, and yet my buyer was still getting asked to put in shipping address, and when invoice was paid, i was being asked to provide shipping label by X date or Consequences.)
SO APPARENTLY YOU HAVE TO DO THIS as the SELLER
SO go to the invoice (i think this can be done BEFORE the buyer pays?? Didnt try myself tho, i did it after it was paid), and click on VIEW DETAILS in that first box
Scroll to the bottom of the page and click ADD TRACKING INFO
(YES COUNTER-INTUITIVE AS BALLLLLS.)
of course HERE IS WHERE YOU’RE GIVEN INSTRUCTIONS ON PROCESSING DIGITAL GOODS. HIDDEN BEHIND A BUTTON YOU WOULDNT PRESS IF YOU WERE, SAY, TRYING TO SELL DIGITAL GOODS.
Select Order Processed/Service Rendered
YAY this stuff fills itself out and you can save and not have to worry about shipping your Digital Intangible Product to a very confused seller.
I am so salt about this. excuse me while i go cry angrily.
Think I’ll reblog this for my own use…
Guess I gotta get used to sending invoices for all transactions soon then
i have been getting commissions from trusted clients, but as i expand the busyness i feel the need to save this for later.
invoices arent hard yalll
The most confusing part for most digital artists is the last bit but its very important!! Please do this so you don’t have issues with your paypal !!
This also means how to avoidrebooting a comic several times as well.As a former Reboot Queen, I thought I would post this for new webcomic creators or even ones who’ve been at it a while and are just feeling kind of uncertain about their work.
I actually posted this on a forum first, but thought someone here might also find it useful. XP Note that these are not unspoken rules or anything! First and foremost, do what you feel you need to! Everyone learns in their own way.
1: At the beginning, aim shorter. If you’re just getting into webcomics, try some experimental one-shots first. It’s the comics with no end in sight (or an ending waaayyy too out of sight) that are more likely to be left unfinished. If your projects involve characters or plotlines you REALLY want to use again, you can always leave them open-ended to continue them, or just move on to your grand, epic project after getting the hang of things a bit first. XP It’s just better to start out kind of slow and learn your strengths and weaknesses. Or even if you’re not new to comics, this is still a good way to experiment.
2: NEVER start a comic on a sudden inspiration. You want to make an art or some short comics when this happens, cool, but what seems great to you one month may seem kinda lame the next. I mean, sure, we all have moments where we’re not as interested in our comics, but if you pick subjects you truly love, it makes it easier to plow through those downer moments. XP Heck, this advice can go for ANY sort of project.
3: If possible, avoid rebooting old chapters because of amateur art/writing. If you absolutely need to for publishing reasons or to change some plot elements, then do what you must, but doing this can REALLY slow things down. That old art/writing may make your eyes bleed, but remember that most readers really don’t mind and even enjoy seeing an artist grow.
4: Even with a longer series, have an ending in sight. Again, kind of related to tip 1. Basically, unless you’re making a comic strip or slice of life or something, make it possible to reach the end of your comic in your lifetime! Consider trimming unnecessary bulk from your story.
5: Don’t let readers’ opinions sway you! I don’t mean ignore helpful constructive criticism, I mean people who question how a character acts, or say “I hope this doesn’t happen!” or anything that might be making you second guess parts of your story. I actually spazzed out and changed an entire character because people were considering her too ‘Mary Sue’, and a lot of the reboots I made were partially influenced by reader opinions as well! Make the story YOU want to make, don’t worry about your characters being cliched (heck, even if they are), or people having a different opinion of your characters than you expected. Stay the course! XP
Though also remember that it’s okay to have unfinished webcomics. They helped you learn and are still art, so they were worth the effort.^^
So being tired of people constantly labeling every type of Indian dress as a “sari”, I figured I would make an informative post so that you all can educate yourselves. There are numerous variants of these, so I’m just presenting the basics.
(1) Sari
Basically a strip of unstitched cloth, ranging from four to nine meters in length, that is draped over the body in various styles. The sari is usually worn over a petticoat, and they’re known for their pleated fronts on the skirt portion. If your sari doesn’t have lovely pleats, you’re wearing it wrong. The blouses for saris can either cover or show the midriff. Dancing in a sari takes a lot of skill. This is a traditional dress so don’t be fooled into thinking they’re fancy wear—there are plenty of casual saris.
(2) Ghagra/Lehenga Choli
Traditionally worn in Rajasthan and Gujarat, as well as Punjab in folk dances and for weddings. It is a combination of lehenga, a tight choli and an odhani. A lehenga is a form of long skirt which is pleated. It is usually embroidered or has a thick border at the bottom. A choli is a blouse shell garment, which is cut to fit to the body and has short sleeves and a low neck. Blouses can either cover or show the midriff area. This is a very wonderful dress to wear for dancing. It’s Southern counterpart is the Langa Voni.
(3)Salwaar Kameez
Traditionally worn in Punjab, Haryana, and Himachel Pradesh, though now has become the most popular dress to wear. It’s referred to as a “suit” by many, and is similar to the suthar in Sindh and Kashmir. It consists of loose trousers (the salwar) narrow at the ankles, topped by a tunic top (the kameez). It is always worn with a dupatta which can be used to cover the head, otherwise draped over the shoulders. Most young women wear this in lieu of Western clothing on a casual basis.
(4) Churidaar Kurta
A variation of the salwaar kameez. A churidaar fits below the knees with horizontal gathers near the ankles. It’s usually worn with a long kurta or a kameez. This is considered more “fashionable” than the salwaar kameez, and can be casual or dressed up. They look amazing, but sometimes the tightness around the legs can be constraining—like skinny jeans.
(5) Pattu Pavadai/Reshme Langa
A traditional dress in south India and Rajasthan. It’s usually worn by small girls and teenagers.The pavada is a cone-shaped garment, usually of silk, that hangs down from the waist to the toes.
(6) Langa Voni
A type of South Indian dress mainly worn in Andhra Pradesh, Tamilnadu, Kerala, and Kamataka. It has two components—the langa is the cone shaped long flowing skirt that covers the body from the waist, reaching the feet. In some cases, it might be as long as knees or just lower than the knees too. The second part is the blouse, or a jacket, that covers the upper part of the woman’s body. It’s Northern counterpart is the Ghanga Choli.
(7)Mundum Neriyathum
The traditional wear of women in Kerala. It’s actually the oldest remnant of an ancient form of the sari, which only covered the lower half of the body. The most basic traditional piece is the mundu or lower garment while the neriyathu forms the upper garment of the mundu.It is the cultural costume of women in the Malayali community (often referred to as the kerala saree).
(8) Mekhela Sador
Traditional dress of Assamese women.There are three main pieces of cloth that are draped around the body. The mekhela which is the bottom portion and is in the form of a sarong folded into pleats to fit around the waist. The top portion is called a sador, which is a long length of cloth that has one portion tucked into the mekhela and the rest draped over the body. The third piece is the riha, which is worn under the sador.
Again, there are various styles and types to each of their dresses which vary region from region. Some styles are casual, while others are for more formal occasions or used as bridal gowns. These different styles of dress can be found in other South Asian nations as well, though may be called something slightly different. (Example: Salwaar kameez are very common throughout the region). Hope this was of some help!
[Explanations are a mix of things from Wikipedia
(to make my life easier) and my own comments]
One of the thriftiest, most versatile ways to garden is what’s called Straw Bale gardening. Often cheaper than garden soil or fertilizer, straw bales are found virtually everywhere. Craigslist, home depot or other home improvement stores will sell them for pennies on the dime when push comes to shove.
But what can you grow?
The answer: just about anything.
Moisture and heat collect in the straw bale like a trap. Tomatoes, corn and other tall plants can break the bale apart the taller they get, but potatoes and herbs will thrive in your bale.
Hay bales start to decompose just hours after they get wet and can provide an atmosphere better than your greenhouse. By digging a hole into your bale, dropping in some soil around your plants and packing it firmly, you’ll add some stability to your plant and as your bale decomposes, it will provide a steady source of nutrition all throughout the growing season.
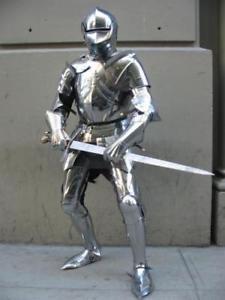
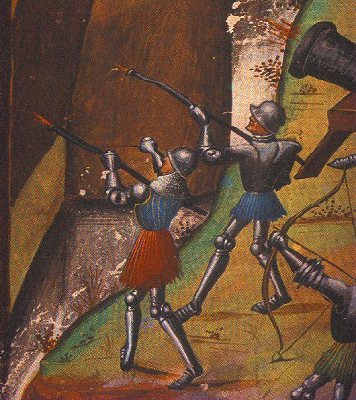
Knights with guns is a real historical thing and, well, if you want a serious answer it’s probably because actual Medieval war history is not well-known or well-represented in pop-culture.
That’s one of the reasons why I find real Medieval arms and armor so cool, especially when placed in a fantasy setting. It’s because most writers of fantasy settings are copying what the previous generations of writers described, and the previous generation was describing what they saw from the generation before them, and none of them were doing any research, resulting in a long line of distorted and warped representations of “Medieval” warfare. Because of this, when a writer or artist actually does the research, it improves the coolness factor not only because you know that more work was put into the piece of media you’re experiencing, but also because that historically accurate stuff you’re seeing is new. Since it’s rare to see historically accurate arms and armor in fiction, the historically accurate arms and armor make the work feel creative and original compared to its peers, even though technically it’s just copying something that really exists in a museum somewhere.
And knights with guns is a pretty extreme example of that. It’s one thing to have historically accurate 15th century armor in your fiction
but pop culture teaches us that the handheld gun is a very recent thing that, once invented, brought about the end of the knight in shining armor because bullets can pierce plate armor and that’s why U.S. Marines aren’t out there in 60-pound suits of steel, but history and technology arn’t ever that straightforward. People don’t immediately give some traditional thing up just because a new invention has made it useless(look at how many armies still marched slowly in formation during WWI despite the spread of machinegun and mortar technology), and even if people did immediately give up the old ways as soon as something new came along, plate armor sticking around despite the popularization of handheld gun technology is not even an example of that. If you want to put guns in your story, don’t think that it automatically removes plate armor because plate armor is now useless(hell, most writers keep every character in full plate armor even though they write swords cutting straight through it, effectively making it useless extra weight in the world of their story.).
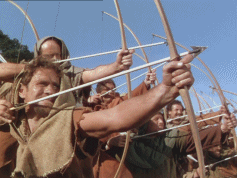
Plate armor doesn’t become useless just because a bullet can pierce it. If that were true, it would have been useless the same decade it was invented(the mid-14th century), because at that time, English longbow arrows and crossbow bolts were said to be piercing it too, or at least hitting with such force that it badly concussed the wearer inside the armor. But that hardly makes armor useless. Arrows, crossbow bolts, spears, etc. were piercing chainmaille before plate armor was invented and they still wore that.
Here is a metaphor:
Your objective is to cross a rainy parking lot without getting wet, and you have the option of taking or leaving your umbrella. Thinking that plate armor disappears as soon as guns are introduced to the setting is like saying that the umbrella is useless because it won’t protect you from a firehose. When you’re standing twenty feet from an English longbowman who has practiced so rigorously for twenty years that his left arm is visibly deformed, NOTHING can protect you,
but when you’re two-hundred yards away being pelted by arrows falling from the sky at an angle, you want as much armor coverage as you can get, even if it wouldn’t protect you from a canon. Even just a really thick shirt is better than nothing in that case, because even that could block a few arrows, or at least stop them from going into your body as deep as they would otherwise.
You can’t just cut through plate armor with a sword either. It’s too solid and swords are too light. That doesn’t mean an unarmored man can’t kill an armored man with a sword–he still can if he gets it threw the viewport or caves the helmet in with the butt of the sword–but it’s a hell of a lot harder for him to win than his opponent because the targets he has to hit on his opponent’s body are a lot smaller; and that’s what armor is all about: It will never make you completely invulnerable, but it makes your weak point a whole lot smaller than your opponent’s. For virtually any weapon, an unarmored man’s whole body is a weak point.
And even then, the evidence is in favor of the fact that plate armor wasn’t even just one of those things that stuck around because of tradition after guns became widespread. In fact, they were using handheld guns for as long as they were using plate armor.
(A handheld gun from the 14th century.)
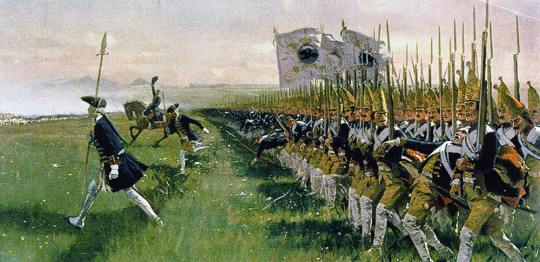
Until pretty recently in the lifespan of guns as a technology, plate armor could stop bullets. Guns didn’t bring an end to plate armor because they were just too powerful for it, it was because rulers realized that guns were just so much easier and cheaper to use than fully-armored knights. You could train someone to use a gun faster than you could train someone to use a bow, and for a whole lot less money. A wagonload of gold could buy you one fully-armored horseman, or one-thousand lightly-armored handgunners. Even though the knight could probably 1v1 all of them in a row, he can’t stand up to a whole army at one time(oversimplified but you get the point). Thus, heavy armor gradually gave-way to large formations of musketmen firing in volleys.
But that still means there was a several-century period of time were plate armor and guns were frequently found on the same battlefield.
In conclusion: Knights holding guns is cool not only because you’re combining two things together that are already cool on their own, but also because in real life knights used guns, yet you never see it in movies or video games because nobody does any research, so in the rare cases when you do see it it’s something new and fresh and original.
This is excellent, and fun, too.
Here are some extras for @sirobvious’s post:
This is an example of a knight with a gun (with armour that richly decorated, he’s a knight at the very least) from the Elizabethan period about 1588…
Here’s another from the Thirty Years War and English Civil War period, about 1640s, members of Sir Arthur Haselrig’s cuirassier regiment known as The Lobsters.
This fantasy art features vaguely late-medieval Gothic with a sallet and bevor, but to my eye rather modern-looking guns…
I reblogged it a couple
of years ago, and commented that an axe-head wasn’t a good “bayonet” since that assault-rifle
gun was all sorts of wrong shapes for an efficient axe-haft. Gun-axes (and gun-swords) did exist, but the firearm was an accessory to the blade; bayonets are an accessory to the firearm.
There were period weapons which would make better bayonets, such as the partizan (top)
and Ahlspiess:
The battle of Crecy (1346) was one of the most notable Hundred Years’
War victories won by use of the longbow (more so IMO than Agincourt) but it
also saw the one of the earliest uses of field artillery, which may have been
volley-guns called “ribauldequins”,
“crakys of warre” or “organ guns” rather like this repro.
…though they may also have been single-barrel guns like this…
Here’s the sort of “transitional” armour worn at
Crecy, though “knights on the same battlefield as guns” isn’t quite the same as “knights armed with guns”…
That multi-barrel
arrangement kept turning up in subsequent centuries, but always with the
same
drawback: it took (barrel number) times longer to reload than a
single-barrel gun. Obviously the gunners didn’t need to reload all of
them every time, but not doing so rather defeated the purpose of having
all
those barrels in the first place…
Here are a couple more period images of knights, or at least men-at-arms, using guns. The earliest is a “fire-pot” which shot enormous arrows, from about 1290 – that nervous-looking gunner’s all-mail armour with ailettes (the little shields at his shoulders) is from the late 1200s…
…while this is a “hand-culverin” or “hand-gonne” from about 1400…
It’s still not a convenient personal “gun” whether pistol or rifle,
more along the cumbersome lines of one-man light artillery. I found this page from Funcken’s “Age of Chivalry Vol.2″ which
has, among other things, a modern interpretation (9) as well
as a mounted knight with a hand-cannon.
It’s based on this engraving from about 1860-90…
…which most sources I’ve seen claim is based on an illustration from a treatise, “De
Machinis Libri Decem”
by Martinus Jacopus,
written about 1449 .
Unfortunately I’ve had no luck finding that original, but
the engraving is as close to being a historical picture of “knight armed with gun”
as I can think of.
A fantasy setting – once you take trouble to explain how it came to pass
– lets you reach a century or so beyond the baby cannons used
alongside High Medieval plate armour, or even the long saddle pistols of the 16th and 17th centuries.
Now you can include very early revolvers – this 9-shot Stopler wheellock
from 1597 Nuremberg is the oldest one known…
…though at least one article points out it’s too
well-made to be the first of its
kind. There were others before it…
There were also breech-loading wheellocks, called “chamber pieces” – once its cartridge was in place the gun was
primed and its spring wound in the usual way. Henry VIII of England had
at least one arquebus like this.
In fantasy you can also play with other repeating or multi-shot
mechanisms – the
“harmonica gun” has been used, but there’s also pepperbox, duck-foot, volley gun,
multi-lock, superimposed load, etc. etc. – which came and went, sometimes in a single
loud and very final explosion. Will
the fantasy multi-shot go Bang! – Bang! – Bang! as intended or, as often in real life, Boom! Can someone find my hand? when everything goes off at once.
Furthermore, in that fantasy setting you may well find wizards,
sorcerers and other bright-lights-loud-noises-and-death-from-a-distance
merchants who have something to say about non-magical weapons trespassing on
their specialty. They never strike me as the sort of people who would settle for just a
cease-and-desist letter…
Read “Men At Arms” by Terry Pratchett for one example of a firearm in a late-medieval / early Renaissance setting, before Discworld in general and Ankh-Morpork in particular settled on the late-Georgian / early Victorian feel that it maintained to the end.
The firearm in question (Terry confirmed it) is a
harmonica gun
like this one.
After trying to keep it a mystery in the text, Terry wasn’t pleased when the art by Josh Kirby for the UK first edition had a spoiler right there on the back cover…
OH MY GOD whyyyy did no one tell me you’re supposed to send thank-yous after interviews?? Why would I do that???
“Thank you for this incredibly stressful 30 minutes that I have had to re-structure my entire day around and which will give me anxiety poos for the next 24 hours.”
I HATE ETIQUETTE IT’S THE MOST IMPOSSIBLE THING FOR ME TO LEARN WITHOUT SOMEONE DIRECTLY TELLING ME THIS SHIT
NO ONE TOLD YOU???? WTF! I HAVE FAILED YOU.
Also:
Dear ______:
Thank you so much for the opportunity to sit down with you (&________) to discuss the [insert job position]. I am grateful to be considered for the position. I think I will be a great fit at [company name], especially given my experience in __________. [insert possible reference to something you talked about, something that excited you.] I look forward to hearing from you [and if you are feeling super confident: and working together in the future].
My brother got a really great paid internship one summer. The guy who hired him said the deciding factor was the professional thank you letter my brother sent after the interview.
should it be an email? or like a physical letter?
email, you want to send it within a few hours at max after the interview if you can so it’s fresh in their mind who you are.
Confirmed! I interviewed for a job right after arriving in NY. The interview went incredibly well, and I went home and immediately wrote a thank you letter and put it in the mail. I had a super good feeling about this interview.
I didn’t get the job.
However, a few weeks later, I was called in to interview with another editor in the same company, and I did get that job. I found out later from the initial editor (the one who didn’t hire me) that he had planned to offer me the job, but since I didn’t follow up with a thank you letter, he assumed I didn’t really want it. He offered the job to another contender–but when he got my letter in the mail shortly after the offer had already been made, he went to HR and gave me a glowing recommendation. It was based on that recommendation that I got called in for the second interview.
So: send an email thank you immediately (same day!) after the interview. If you’re feeling extra, go ahead and send a written one too. OR go immediately to a coffee shop, write the letter, and return to the office and give it to the secretary.
Either way, those letters are important.
Pro tip: If you really want HR to develop a personal interest in your application, publicly thank them on linkedin. Just make a short post telling your network about how X recruiter really went above and beyond to make you feel welcome, or about how be accommodating and professional they were, or whatever. Make sure to use the mention feature so they’ll get a notification and see it.
Flattery will get you everywhere… and public flattery that might make its way back to their manager, doubly so.
Obligatory plug for one of FreePrintable.net’s sites: ThankYouLetter.ws. They have a whole section with interview thank you letter templates, and a page with specific tips for interview thank you letters. (There are also tons of other letter templates if you browse around a bit.)
As a former professional recruiter and recruiting manager, I confirm, especially for entry-level positions, where you are competing with oodles of people. This little thing can make a difference. Also the fact that, maybe, you took time to google the “interview etiquette”.
SIGNAL BOOST
Hand written when you know it will get there in time! This is why it’s important to ask about when the next decisions will be made. But email works well in a crunch and you know it gets to them
reblogging here because i can see this being relevant to anyone who’s ever tried to get out of an abusive relationship
Reblogging because that last comment made me reread the whole thing in a new light and realize this could be vital information. So, putting it out there for everyone, and hoping no one ever really needs it.
Try to wake up earlier every day. Like 5 – 10 min earlier than the day before. Until you wake up any time before 8am or so…
If you struggle with waking up & snooze button is you bff:
Put your alarm clock as far away from the bed as possible.
Drink a glass of water right after you wake up.
Pour another glass of water on yourself right after you wake up.
Prepare some coffee the night before, leave it by your bedside, drink it after you wake up.
Have your blinds/curtains open, so that it’s bright after you wake up.
Try to go to bed 5-10 min earlier than the night before.
Track how many hours of sleep you’re getting. Aim to get at least 7h per day or 49h per week.
Increase your sleeping hours incrementally. Aim to get at least 1h of sleep more than the previous week. For example, if this week you slept for 41hrs, aim to get an extra hour of sleep next week, so it’s 42h.Once you get enough hours of sleep and wake up early-ish.
Try to keep your sleeping schedule consistent. It is really important to go to bed and wake up at the same time every day. Even if it’s weekend. Or even if that means, you getting less than 7hrs of sleep that day. I’d say waking up at the same time everyday is the most important step, which will help you the most with fixing your sleeping schedule.
START EATING HEALTHY (1-2 months)
This step really depends from person to person, but firstly I suggest you take some blood tests to see if you have any deficiencies, etc. Especially, if you struggle with cravings.
Try intermittent fasting, if you struggle with binge eating or overeating. As it will help you to learn to listen to your body better: when it’s hungry, when it’s full, etc. It’s really simple, there are many methods of Intermittent fasting, but I’d suggest 16/8 for the beginners. (Google it for more info)
DRINK ALL THE WATER. Again, if you’re not drinking enough water, try to level up your water game incrementally. Download some water tracking app on your phone to help you. Drinking water will make you more energetic, increase your metabolism, and decrease you appetite (among many more benefits).
Track what you eating. I would really suggest tracking your meals for around a month. Because, most of the time people have no idea that what they’re eating is unhealthy. Again, download an app to your phone for that.
Make your own meals once in a while. Not only this will save you money, but it’ll help you to see what’s really going into your body.
Eat less meat and more veggies/fruits. Go to your local market and buy some veggies/fruits, you have never tried before. I’m sure you’ll find your new favs. Eat/buy less meat. Not only it’s good for the environment, but it is good for you, too. Get a veggie burger instead of the beef one, etc.
Cut dairy. Find your new favourite milk substitute. Advice: Oat milk is really good with the tea and oatmeal/porridge; hazelnut milk is amazing on it’s own; cashew milk goes well with cereals.
Define your goals. Do you want to lose weight, do you want to get stronger, gain weight, be able to climb stairs without losing breath, run 5k?
Remember – you’re half-way through. Being physically fit has a lot to do with what you put into your body. So, if you fulfilled the previous step of eating healthy – you are half way through!
Make a plan. A Reasonable plan. Be honest with yourself.
Start small. Like, 5 min exercise in the morning. Or doing 10 sit ups per day. Don’t do anything overwhelming, like running 5k everyday if you haven’t run for the past 5 years.
Make sure that you kinda like what you’re doing. If you absolutely hate running – don’t do it. Hate doing sit ups in the morning? Try some yoga instead.
Explore until you find what you like. You don’t have to go to gym to get fit, especially if you hate it. Find a type of exercise, which you actually like. Maybe it’s dancing or hiking, taking your dog for a walk. Sign up for several trial lessons of various sport clubs. Ditch ‘em if you have them until you find something that you love. Stick with that.
Do the small changes in your everyday life. Stairs>Escalator, Walk>Drive, Do some squats while brushing your teeth, switch from regular desk to standing desk, etc… Find ways to incorporate being active into your everyday life
Track your effort instead of your progress. You cannot really control your progress that much (especially if your goal was to lose weight). However, you can always control your effort. So track it instead. This will leave you more motivated. As you will be able to see that you can do more and more everyday. Whereas, if you tracked your progress, you may not always get the result you hoped for, which might demotivate you and make you upset, wanting to quit.
BEAT DEPRESSION
Do the previous 3 steps and you’re half way through.
See a therapist/doctor. Depression is an illness, requiring medical treatment. So, get it. Remember: there is absolutely no fucking shame in having a mental illness.
Get some extra support. Talk to your friends or family. Or maybe someone on the internet.
Write it out. If you don’t want to talk – write down your thoughts. It can be just as helpful. It’ll help you to understand yourself better, see problems in your thinking, etc.
Distract yourself from yourself. Get someone/something to take care of, so that you can, for a moment, stop thinking about yourself and focus on something else. E.g, get a plant, or a dog, or a fish.
Self-care day. Dedicate at least one day per week for self-care. Take yourself out, either to a museum or some fancy cafe, do some stuff you like, whatever your hobbies are, do some physical self care: bath, face mask, manicure, etc., listen to some nice music, watch a film…..
STOP PROCRASTINATION
Celebrate your victories instead of mourning over your loses.So the only thing you’ve done today was write one sentence for your 20 page essay? Amazing! Buy yourself a candy for that!! I mean, you could’ve done nothing, but you didn’t – you wrote that one sentence and that’s worth celebrating.
Do it for only 2 minutes. If there’s an important thing you’ve been putting off for a while, tell yourself that you will only spend 2 minutes on doing it. If after 2 minutes you don’t want to do it anymore, great, stop it. However, after 2min. you actually might want to do more. No pressure either way.
Track your productivity. Track how much time you’ve been productive that day. Try to increase that time by a little bit every day.
Always forgive yourself. So, it’s been a week and you’ve done nothing? Don’t sweat it. Let it go. Blaming yourself will bring you absolutely nothing. Nothing good will come out of your negativity on yourself. So stop it. Forgive yourself and start again. And again, if you need to. Never stop trying. Always pick yourself after you fall. Beating procrastination and increasing your discipline is a skill. And all skills can be build on. There is nothing in you stopping you from changing. Remember that.
LEARN HOW TO DO TAXES (1h – 1 day)
Go to google.com.
Type in: “How to do taxes *the name of the country you’re living in*”
Read the results.
GET MENTALLY STRONG ENOUGH TO MAKE PHONE CALLS
Remember that just as with beating procrastination, making phone calls is a skill. And, again, skills can be learnt.
Get a new SIM card.
Top it up.
Dial some random numbers and pretend to be a salesman, selling whatever you like.. E.g., trying to sell broadband, cable tv, trying to get people to donate for some charity… Or whatever really… Me and some friends used to pretend we’re selling kittens or wood logs. Alternatively, you can pretend that you dialed a wrong person and talk about whatever, e.g. “Hey, Jess!! You wont believe what I saw today!! *start telling a made-up story*…”
If you get uncomfortable – just drop the call. No consequences whatsoever.
Repeat until you build up your game and your phone-call anxiety starts to diminish.
SLAY THOSE BITCHES Congratulations, now you’re ready to take over the world! Got get ‘em!!